Sunday, December 30, 2012

A Guide To Fires

The outdoors would not be complete without the availability of a fire. Fire is used for so many different things but do you know how to build one and maintain it?

Before you can even consider building a fire you must be aware of the areas fire safety regulations. During the drier parts of the year a lot of camping areas restrict fires to avoid potential forest fires. These restrictions can range from keeping fires enclosed to no fires at all. If you are in a situation where it is an emergency and you need a fire but are unsure as to whether or not fires are permitted your best bet is to make your own fire pit.

The first thing you need is a good spot to build your fire. Avoid areas with low hanging trees and dead branches. You don't want to end up setting a tree's canopy on fire. Also, clear away and debris on the ground. Give yourself a five to ten foot radius to work with. Next, find some rocks, green wood, sand, or anything that won't burn to build your fire pit out of. You should first dig out a shallow hole so that your embers have a wind break. If you have sand available use it to line your pit. Then, surround your pit with rocks or whatever you have available so that the embers stay contained.

Next, you'll want to gather wood for your fire. And lots of it. There are three different classifications of wood that you will need for your fire. Tinder, kindling, and fuel. Tinder is not limited to wood you can use anything small and flammable with a lot of surface area. Dried grass, drier lint, birds nests, and small bundles of twigs work great. For kindling you will need small sticks and twigs. You don't want to use anything that is bigger than a pencil in diameter. Gather about two ball caps full of kindling. Fuel is anything that is bigger than kindling that you have available to burn. You will need enough of this to last for however long you wish to keep your fire burning. You should gather this by the arm full. One armful of wood will last you anywhere from 20 minutes to and your depending on what kind of wood you are using a d a number of other factors including humidity and the wind. When you think you have enough fuel, double the amount you have. Keep you fuel just close enough to the fire that you can access it, if it is wet it will dry out, and it won't catch fire.


Building a fire may seem a bit rudimentary but there is an actual process to it. There are different types of fires for different occasions. For example, a teepee fire is used for lots of flames and is good for smoke signals. A log cabin fire is good for cooking because it creates good coals and is low to the ground.

Teepee

A teepee fire is very simple to build. Start with kindling and build it into a teepee shape ( duh, right?). Next layer on bigger sticks until you have your teepee at the size you desire. Next, prepare your tinder bundle. Depending on the wind direction you need to create an opening in which to place your tinder bundle. If the wind is coming from the west make your opening on the east. This is to prevent the spark from going out. You then place your to for bundle inside of your teepee and light it. As the flames build add more and more small kindling to it until the larger sticks surrounding your fire catch. As they burn they will weaken and collapse to the middle so you will need to add new fuel accordingly.

Log Cabin

A log cabin fire is typically used for cooking. You basically stack your kindling like Lincoln logs until it is about six- eight inches high. Your tinder bundle goes in the middle. Once it is lit it must be fed until the "walls" of your log cabin catch. Then, you just stack fuel on it as needed. If you do plan to cook on it use a few thick pieces of wood across the top that will take a while to burn.

Lean-to

A lean too is very quick and primitive. You just take a log and lean small sticks all across it and put the tinder bundle beneath them.

When extinguishing a fire you must be sure to put all of it out. Unless of course you are going to use it again and you plan to monitor it. If you use water you want to make a sort of soup. If you use sand or dirt pile it on until you don't see smoke any more. To make sure the fire is out run your hand just over the top of it and if you don't feel heat it's out. Remember to leave the area the way you found it. Disperse any unused wood and kick around the leaves so you don't leave a bare patch of land.

Some tips for starting your fire

In a previous post I talked about tree sap and its uses in a survival situation. Adding it to your tinder bundle can help you out a lot when getting a fire started.
If you have lighter fluid or another flammable liquid DO NOT add it to a burning fire. Add it before you even light a match. It is extremely dangerous to add a flammable liquid to a burning fire.
Have some way of edge guiding you fire near by. A fire extinguisher, a bucket of water, or just some loose dirt will work well.
Always be careful with any fire starter and be wary of your surroundings. In the words of smoky the bear, "Only you can prevent wild fires."

Saturday, December 15, 2012

Making Use of Your Environment: Tree Sap

While I was at work I walked by a pine tree that had sap leaking out of it. If you find yourself in a situation where you need a fire sap is a good thing to have to help you out. It is flammable and will help to keep your fire going while you kindle it. If you find a pine tree, or any other tree that leaks sap for that matter, there is a pretty good chance of finding some sap. If you don't find any what you can do is pull off some of the bark, cut a chunk out of the outer layer, and wait. When you come back there should be some sap seeping out. When you have some, break off a few chucks and add it to your tinder bundle and it'll help your fire get going.


What is Sap?


Sap is the viscous liquid comprised of sugars, minerals, and other chemical components that flows through trees. It's better known as that sticky stuff you get on your hands from touching a pine tree. It also has resinous properties. There are many uses for tree sap, many of which can help you out in a survival situation.

For the purposes of this post I will focus on the sap primarily from Pine trees, namely the Loblolly Pine. This particular pine tree grows in abundance in my area and are found everywhere.

1. Flammability

The sap that comes from a Pine tree has chemicals in that make it very flammable, even when it is in liquid form. It is a great tool for starting fires or to use as a back up for fuel for your camp stove.

2. Anti-viral/ Anti-fungal

The Pine sap also has properties that make it very good for keeping wounds clean. If you melt it and put it over a cut it will both seal and protect it from bacteria and prevent fungal growth.

3. Edible

Many pine trees are a great source of nutrients. Boiling green Pine needles creates a tea that is rich in Vitamin C and when mixed with the sap provides a good source of natural sugars. The inner bark of young trees can be even be eaten.

4. Fuel

Everything about a Pine tree can be used for the purposes of a fire. If you are in a Pine forest you have all the tools you'll need for starting a fire. Fallen logs can be used as fuel, the needles and bark can be used for tinder and kindling, and the sap can be used to sustain your tinder bundle.

Wednesday, December 12, 2012

Homemade vs. Store Bought: Backpacking Stove

Every serious camper, hunter, backpacker, or any outdoorsman knows what a backpacking stove is and its importance. It is definitely something you should have with you if you plan to be in the outdoors for an extended period of time. Now, this doesn't mean that you have to go out and but a seventy dollar piece of equipment. For very little money you can make your own.


I went to my recycling bin and found this metal can that is the perfect size (as opposed to a larger one that you would cut down to size). I believe this can used to contain Blue Diamond Almonds.

The Process:

Step 1: Using a thumbtack push holes all around the can. This allows heat and oxygen to pass freely but not too much heat so that it doesn't heat up. 


Step 2: You have to create an opening that you can use to monitor your fuel, adjust heat, and take the fule source out or put it in easily. In the first picture ther are two dents in the metal. This was to mark how wide I wanted my opening. 


 Here is what my opening looks like. 


 Optional: I bent back the edges so that I wouldn't cut my finger. 

 Step 3: Add a whole to the top so heat will escape and move up through the center of the can. 

 Step 4. Cut from the circle out so create a sort of cross hairs. 


This is my finished product. I put a tea light candle in it to test it. These tea lights can also be used as a heat source but they do burn quickly and dont put off a substantial amount of heat.  You would have to use a few of them.


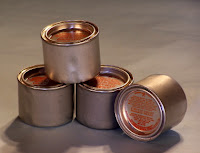
I would suggest using Sterno. It is a gel fuel that would work nicely with your new back packing stove. 


Sterno

Homemade vs. Store Bought
This is my homemade stove next to my store bought one. It is an MSR backpacking stove and uses MSR propane fuel. It is very nice but it was a little pricy. As you can see they look very different but I assure you the homemade one works just fine. The best part is I made it for free so if it didn't work I   could throw it away OR use it for something else. 


I challenge you to make your own backpacking stove out of what you have lying around. Post your picture and process in the comments.

Thanks for reading!

Homemade vs. Store Bought: Survival Kit

When it comes to "survival" many people think they have to go out an buy a pre-made survival kit. This is not the case. You can walk through your house and pick up a few odds and ends you have laying around and put into a container and have it be just as good if not, better than one you would but at Cabela's or REI. 

The Challenge: 

I walked around my house picking up stuff that I could put into a survival kit. I'll admit I may be at somewhat of an advantage because I was in the Boy Scouts, a Venture Crew, and I'm outdoorsy. However, that doesn't mean you can't do same thing. Everything I have was a hand me down, bought from a garage sale, found, or given to me as a gift. 

The Loot:

This is what I found in only FIVE minutes of walking around opening doors:

A dozen or so razors
A LOT of cotton swabs


Electrical tape
Scissors
Forceps
A pocket knife/ Bottle opener combo
Pony tail holders
A few match books
A paint brush

Medical Tape (two kinds)
Floss
Pain Medicine
Bandaids 
Travel Size Gold Bond, Shampoo, and Conditioner


An analog watch

Tea light candles
A whistle
A small fishing kit
Finger nail clippers


Rope


Army canteen
Mosquito repellant for a butane candle + the butane candle+ butane
Mylar blanket
Mess kit
Metal coffee mug
Compass
Mini First Aid kit
Backpack poncho
Snowboarding mask
Several pocket knives
Water proof phone case with lanyard

More matches and Tea lights


An old army First Aid kit box


I only glanced in these drawers and took about 5 minutes to do it. I could build a quick, efficient survival kit and the best part is: I didn't spend any money. Of course someone bought this stuff but I don't have to go to the store and buy specifically for a survival kit. 

My challenge for you is to do the same. Take a few minutes to walk around your house and see what kind of a survival kit you can build

Homemade: Emergency Survival Kit

Recently a friend of mine asked me if because I was an Eagle Scout I could survive in any situation. Although I wish it were true, it is not. The amount of experience I have and training gives me a good chance of making a survival situation easier and bettering my chances of making it home in good shape. He asked me if I had one of those really cool emergency survival kits that they advertise on websites like REI and Blue Ridge Mountain Sports. The answer is no. Why would someone go out and spend a fortune on a survival kit that you simply make at home and have it be way cheaper? Here's mine:


  • An old backpack from an army surplus store
  • A Leatherman Supertool 300
  • A Smith and Wesson Search and Rescue fixed blade knife
  • Knife sharpener
  • A large Ziploc container
  • A roll of duct tape
  • Home made first aid kit
    • Assorted Band-Aids
    • Sterile Gauze
    • Medical Tape
    • Rubbing Alcohol
    • Hydrogen Peroxide
    • Nylon rope
  • Black trash bags
  • Clear trash bags
  • A compass
  • A whistle
  • Home made fishing kit
    • Spool of line
    • Hooks
    • Sinkers
    • Some fly tackle
  • Backpacking stove + fuel
  • Mess kit
  • Matches
  • Lighter
  • Dryer lint
  • Sleeping bag
  • Chewing gum
  • Mirror


My survival kit has some stuff in it that is kind of pricy only because I have acquired over time while I was in the Boy Scouts. Most of the stuff I have was either free, from a surplus or thrift store, or I bought it at the dollar store. I also have a few things I could honestly take out but I keep them because it fits, it's light weight, and you never know what could be useful. Everything I have in my kit has more than one use. If you don't believe me, leave a comment and I'll explain.

Eventually I'll put up a picture of my kit but for the time being it's nice and packed and I'd like to keep it that way.

Thanks for reading!

Wednesday, October 31, 2012

Happy Halloween

Just want to wish everyone a safe and happy Halloween! What's your costume?

Tuesday, October 30, 2012

SelecTool: Master Sharpener [Product Review]

If you are like me and like to keep your knives sharp but find doing so to be tedious then you're in luck. I discovered this product while browsing my local SGK Gun show. It is a multi function knife sharpener that can be used for shears, scissors, as well as knives. It is a three step sharpening procedure but it is much quicker than using sharpening stones. A huge bonus for me is that is made entirely in the US and was assembled by American veterans. Want to learn more about this product? Watch the video below and follow or, follow the link provided. I actually met the man in the video at the gun show and talked to him about his product and have to say that the demonstration that he gives is definitely persuading.


http://www.sharp4life.com/

Monday, October 29, 2012

Cigarettes Can Help You Survive?

As my very first post (besides my welcome post) I am going to get the ball rolling with an item that quite a few people have with them. Cigarettes. It is estimated that a third of the world's population smokes. That's roughly 2.4 billion people so, the odds of someone having cigarrettes or being with someone who has cigarrettes with them is pretty high. I myself am not a smoker but if I were in a survival situation I would want to have them with me and not for the "feel good"affect it elicits  First, let's look at the medicinal qualities of tobacco. The plant Nicotina has been used for centuries for more than just smoking. It has many different medicinal qualities. If you find yourself in a situation where infection is a high possibility rubbing tobacco in a wound can help. Tobacco can be used as an antiseptic to help to prevent infection. When it enters your blood stream through ingestion or smoking it can act as a sedative and a muscle relaxant which, in the event of a trauma, can help. This is helpful especially with dislocations and fractures. When the body experiences trauma like a fracture it is prone to muscle spasms which can only make it worse.  Tobacco will calm the body and help to prevent it. Tobacco also has qualities that made it useful as an insecticide. If you find yourself being chewed up by insects rubbing it on your skin in the exposed areas can help fight them off. Cigarrettes can also be used as a tool. If you are low on matches or have trouble making fires you can use it to carry an ember. By just lighting the cigarette it will slowly smolder because of chemicals that are found in the mixture however, if you doesn't have a steady flow of oxygen it will extinguish itself. Most cigarrettes have filters on the bottom of them. These have numerous uses. If you allow them to dry you can use them as tinder to start a fire, they can be put into a straw and used to filter water, if you have a trouble with small flying insects you can plug your ears, if your nose it bleeding they can be used to slow or stop the bleeding. If you still have the box you have a container or another thing to help to kindle your fire if there isn't a lot of small dry stuff to help start your fire.


This is the average cigarette, as you can see there is a small
filter in the colored end.  It has many uses. 

EDIT: I did a test and found that a cigarette when lit and not smoked will last for 20-25 minutes. When I did it there was no wind, it was night time, and it was 43˚ F outside. Also, the average cigarette lasts about six minutes when you do smoke it. I'm sure that depending on the wind and temperature it these times will vary. 


Welcome!

To start off my blog's internet life I would first like to welcome you all and thank you for viewing my blog! Please bear with me as I get the ball rolling with running this site. I'd like to start off by asking you to please comment or email me with items that you would have with you on a normal out door trip, camping trip, hunting trip, etc. Then, I will take these items and tell you how you can use them to help better your survival situation. Also, feel free to ask any questions via comment or email. Thanks!